MemoryVisualizer4J
Getting Start
This document will help you get started with MemoryVisualizer4J from downloading the library to starting use the visualizer.
Download the release
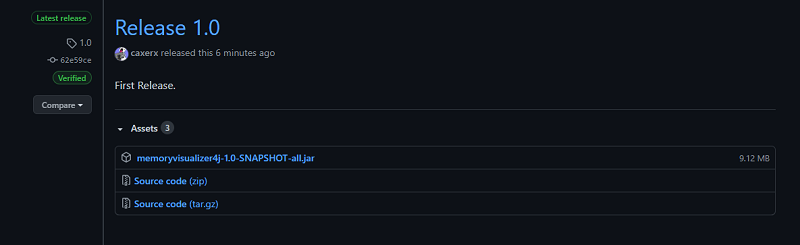
First, download the library from the Release Page on Github. Choice the .jar file on the release page and download it.
Setup as dependency
After downloaded the library, you need to setup the library as dependency to use the MemoryVisualizer4J API. You only need to check the corresponding IDE section that you are using.
IntelliJ IDEA
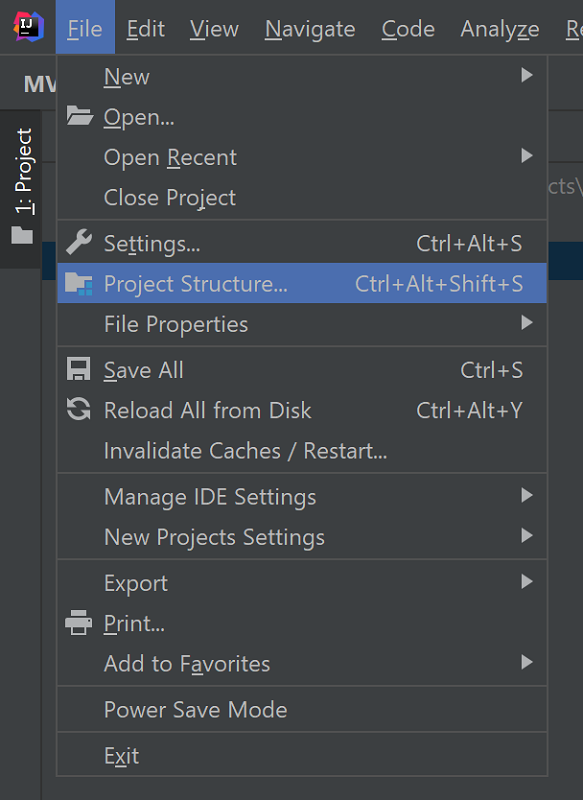
First, choice File > Project Structure on the menu bar.
Then, on the Project Structure Panel. Select Project Setting > Libraries and click on the  Button. Then select
 New Project Library > Java.

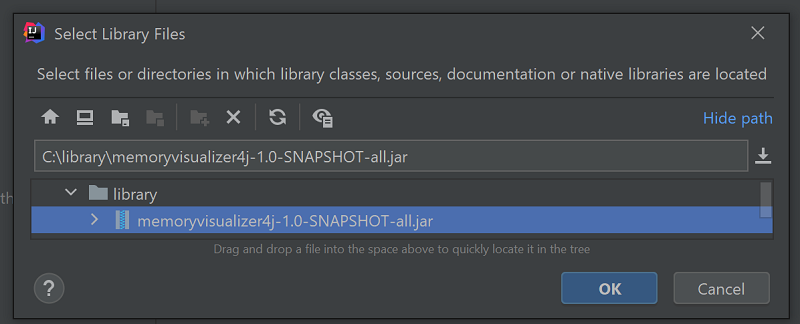
After that, select the MemoryVisualizer4J library file you just downloaded. Then click OK.
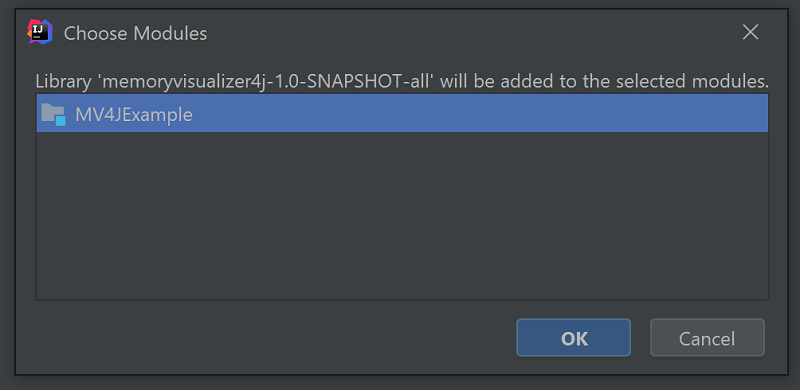
If you are asked for choose a module, select the your project name, and click OK.
Finally, click OK in the Project Structure Panel and back to the main page and you are finished the setup.
NetBeans
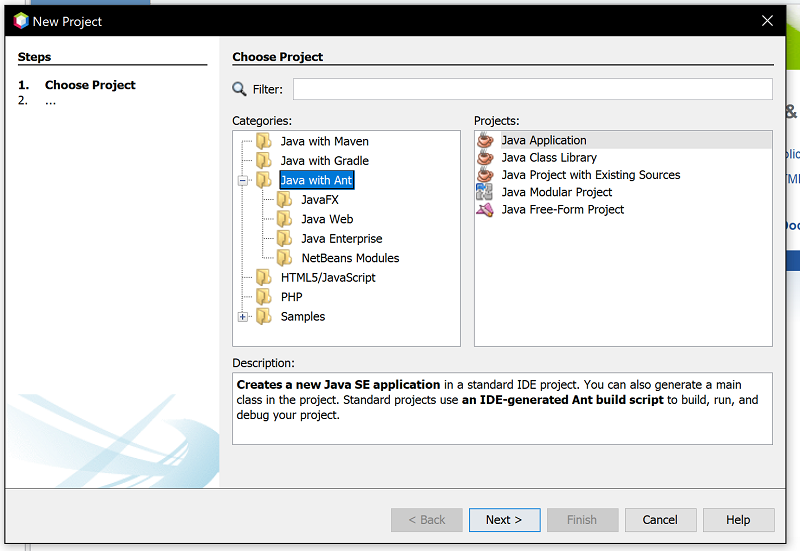
First, create your project with option Java with Ant > Java Application
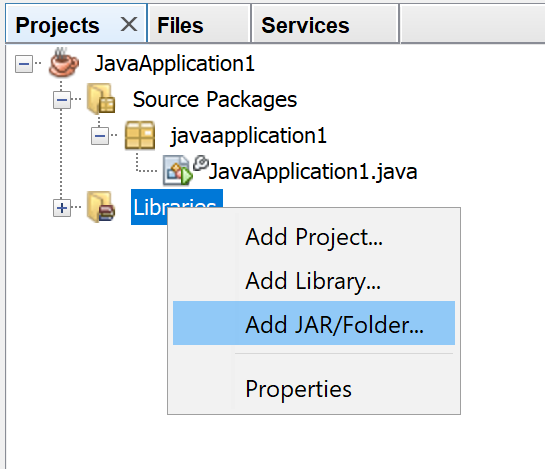
On the Projects Panel, select Libraries > Add JAR/Folder
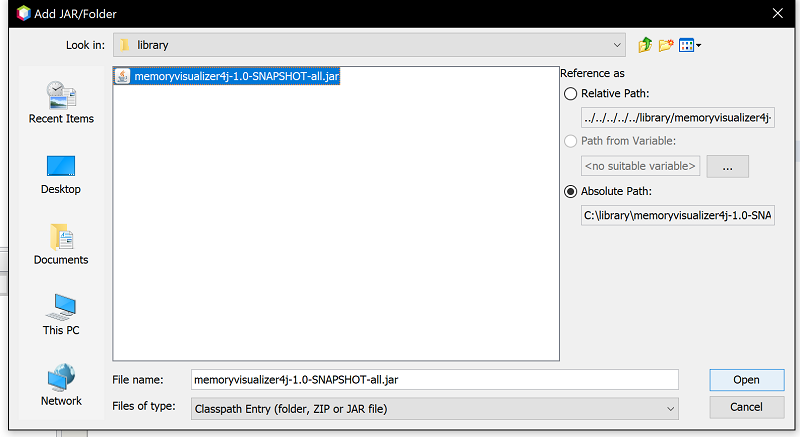
After that, select the MemoryVisualizer4J library file you just downloaded. Then click Open. Then back to the main page and you are finished the setup.
Eclipse
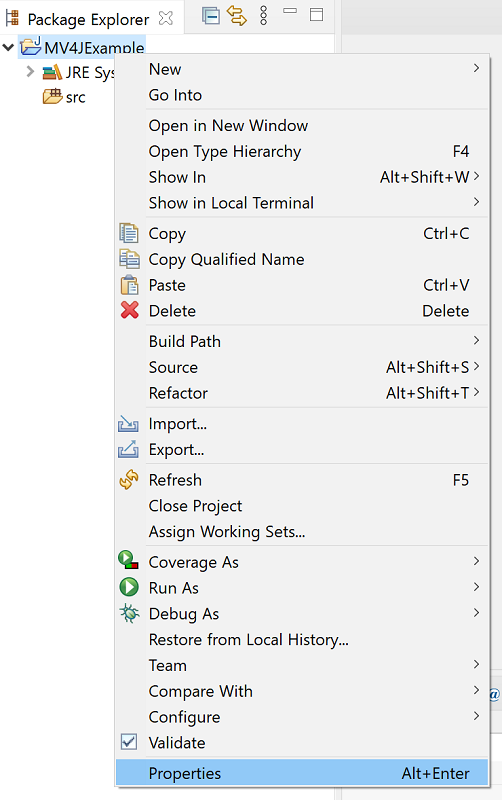
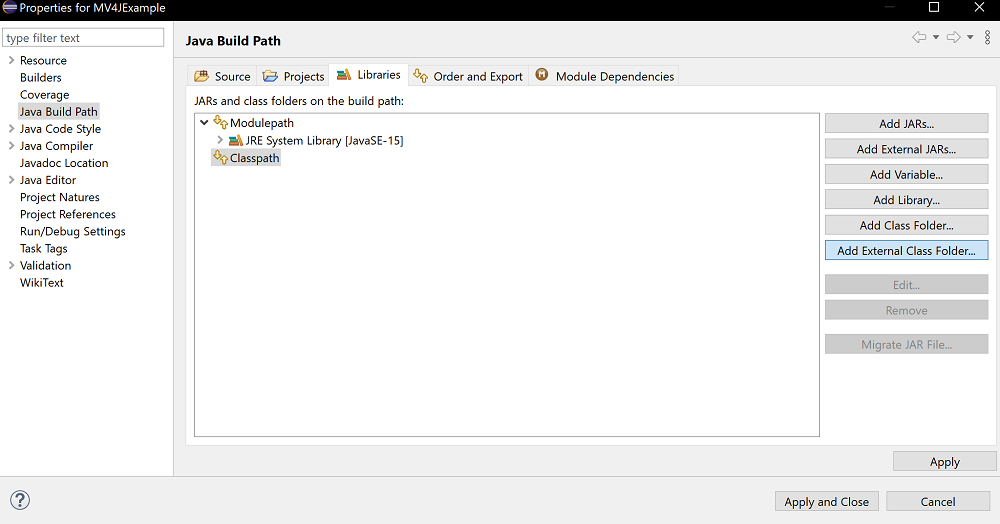
First, on the Package Explorer, Right Click and click Properties
On the Properties Panel, Select Java Build Path > Libraries and Choice Classpath on the list. Then click Add External JARs...
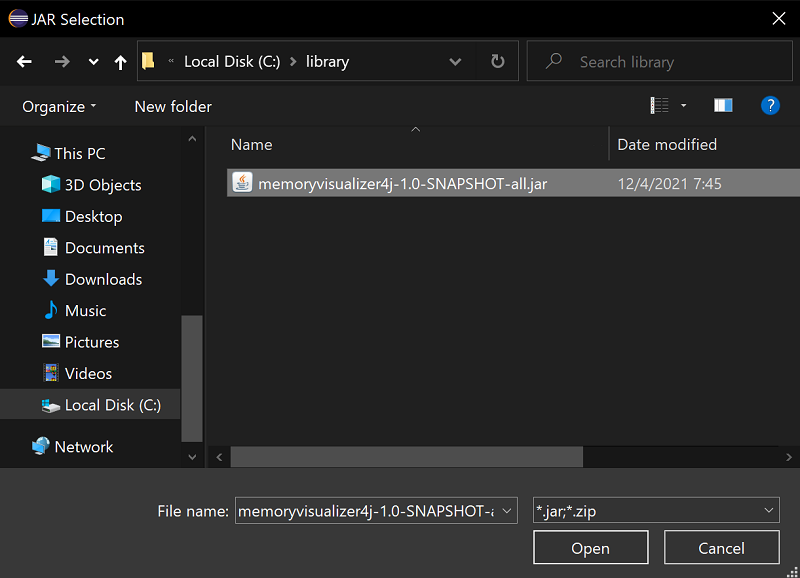
After that, select the MemoryVisualizer4J library file you just downloaded. Then click Open.
After that, click Apply and Close on the Properties Panel. Then back to the main page and you are finished the setup.
Start Visualizer
To start use the visualizer, you can try this code snippet in your Java class.
public static void main(String... args){
    MemoryVisualizer4J.getMemoryVisualizer()
                    .registerObject("Memory Visualize Test")
                    .visualize();
}
If you get error on the code, you may need to import the class of MemoryVisualizer. Add this line on the top of your class.
import com.caxerx.memoryvisualizer4j.MemoryVisualizer4J;
Then, try to run the program, you should see these line appeared on your console. Access http://localhost:20000 to open the visualizer UI.
Be aware, the url of the visualizer is not always
http://localhost:20000, always check the url of the visualizer.
[main] INFO VisualizerWebServer - Visualizer Service started at: http://localhost:20000
[main] INFO VisualizerWebServer - Visualizer Service started. Application will not stop until manually terminate.
For more information about how to user the Visualizer UI, check Introduce to Visualizer UI